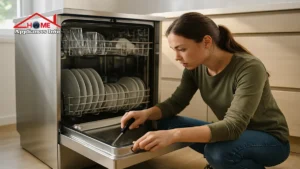

Hello everyone, Today I’ll be talking about some testing methods and common faults and microwave oven repair, one of the most common electrical appliances. If you’re interested in working in this field or want to learn the skills, you should definitely read this.
When I first graduated and was renting, I bought a second-hand microwave oven, but it broke down in less than a month. I didn’t want to spend money on a new one, and I couldn’t afford the high repair costs, so I gritted my teeth and took it apart myself to figure it out. Surprisingly, I actually fixed it! This opened a whole new world for me in appliance repair. Today, I’ll share my microwave oven repair experience, accumulated over the years, with you in the simplest way possible.
I. Safety Precautions Before Microwave Oven Repair (Safety First!)
1. Power off! Power off! Power off! I’ll say it three times because it’s important: you must unplug the power cord before disassembling the device.
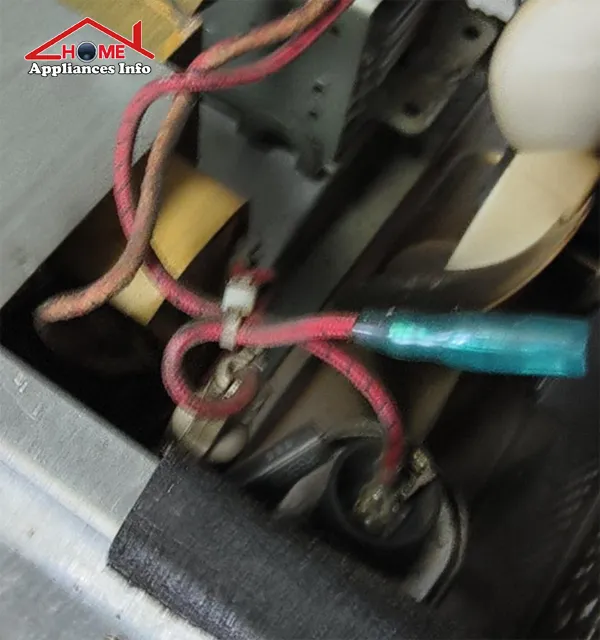
2. Discharging a high-voltage capacitor : Short-circuit the two terminals of the high-voltage capacitor with an insulated screwdriver (it will make a “pop” sound); otherwise, you may be shocked.
3. Protective Equipment: Prepare insulated gloves and goggles, as microwave leakage is very dangerous. (However, sometimes insulated gloves are really useless, but remember never to touch high-voltage areas.) I have personally witnessed a novice touch a high-voltage capacitor without discharging it, and was shocked so badly he was thrown back…
II. Tool Preparation Checklist
Phillips screwdriver (essential)
Multimeter (one with a buzzer function is recommended)
Insulating tape
pliers
flashlight
A small notebook (to record the disassembly steps; phone videos are fine too, but handwritten notes are clearer to remember).
III. Fault Diagnosis Flowchart (Save for future reference)
Microwave oven not working → Check power supply → Normal → Check fuse → Blown → Check high voltage diode/capacitor (around 0.8V) → Replace power cord. If normal → Check door switch.
IV. Practical Repair of Five Common Faults
1. The microwave oven won’t start at all (no response whatsoever).
Possible reasons:
Power outlet issues (30%)
Door switch malfunction (25%)
Blown fuse (20%)
Repair steps:
1. Test the socket with other electrical appliances.
2. Check the door switch: Use a multimeter to measure continuity; a common model is V-156S.
3. Check the 8A/10A fuse (located near the control panel).
2. It is running but not heating.
Key areas of inspection:
High voltage diode (tested with a multimeter: forward conduction and reverse cutoff; however, some digital multimeters may not detect it, which is related to the multimeter battery and the multimeter’s measurement value. If you don’t understand, you can ask me in the comments section.)
Magnetron (normal resistance <1Ω)
High voltage capacitor (capacitance 0.9±0.1μF)
Actual measurement data:
Magnetron filament resistance: Normal 0.5-1Ω, ∞ indicates open circuit, 0 indicates short circuit.
3. The turntable does not rotate but can still heat.
Typical fault points:
Turntable motor damaged (12-24V DC motor)
Motor power supply line open circuit
Turntable bracket stuck
Tip: When you manually rotate the turntable, there should be no noticeable resistance.
4. Button malfunction/Display abnormality
Solution:
1. Clean the button contacts with alcohol.
2. Check if the thin-film cable is oxidized.
3. Test control board power supply (normally 5V/12V)
5. Microwave oven arcing
Danger warning: Discontinue use immediately!
Solution:
Replace the mica sheet
Clean the oil stains inside the cavity
Check if the waveguide cover is damaged.
VI. Testing is mandatory after repair.
1. No-load test: Place a cup of water in the water and heat for 1 minute.
2. Leakage test: Place the phone inside a microwave oven and close the door to make a call (if the call connects, it means the shielding is ineffective).
3. Odor Check: New parts may have a slight odor; if the odor persists, immediately disconnect the power.
VII. Beginner’s Guide to Avoiding Pitfalls
1. Do not adjust the magnetron position arbitrarily: this will affect microwave efficiency.
2. Use alternative parts with caution: especially for high-voltage components.
3. Keep photos of the disassembled device: to avoid having extra screws when reassembling.
4. Be cautious when repairing old microwave ovens: those over 8 years old are recommended to be replaced directly.
A recent case I helped my neighbor fix: their microwave was heating slowly. Upon inspection, it was found that the high-voltage capacitor had only 0.3μF remaining (nominal value 0.9μF). After replacement, the heating speed returned to normal, and the total cost was just little.
The most satisfying moment in repairing a machine is hearing that “ding” sound and the instant it starts running again. I suggest starting with simpler problems and not brute-force your way through complex issues. Feel free to discuss any specific questions in the comments section; I’ll reply to all of them!