

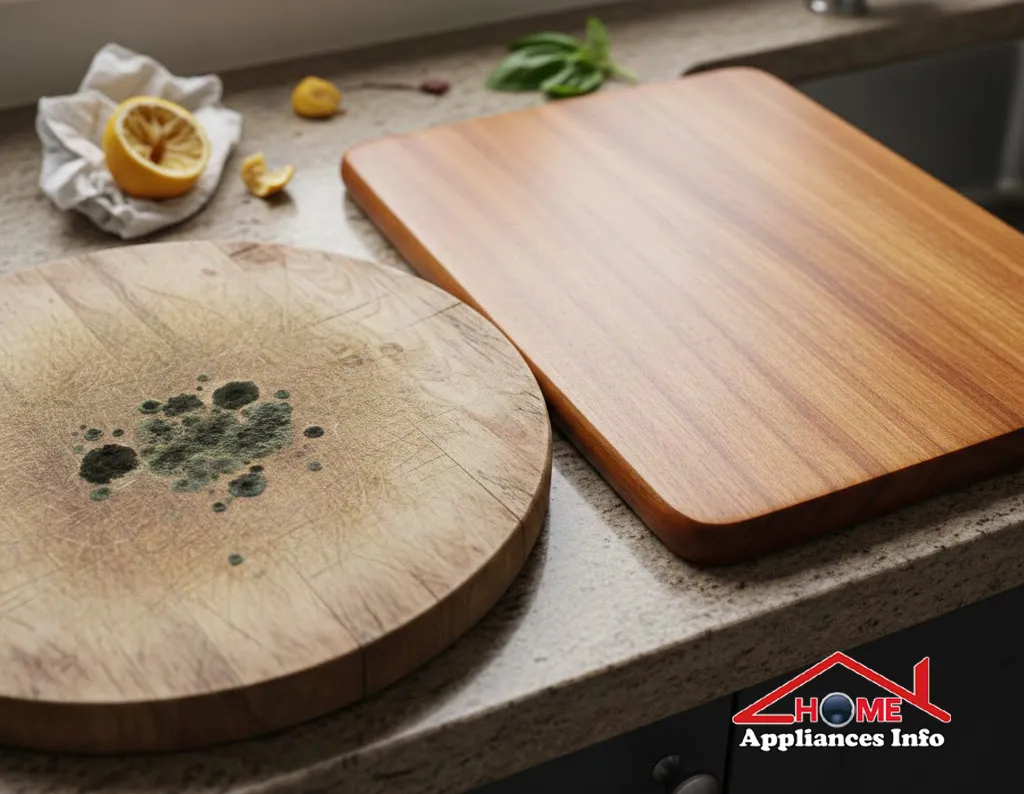
Finding a moldy cutting board in your kitchen can feel unsettling. You may worry about your health, your family’s safety, and whether you need to throw the board away. 😟
The reassuring part is this: some boards can be rescued safely, as long as you follow clear, health-based steps. Others do need to be replaced, and knowing the difference matters.
This guide walks you through how to clean moldy cutting board surfaces in simple, structured steps. You will learn when to save your board, when to toss it, and how to prevent mold from returning.
Let’s go through five proven ways to deal with a mold-stained board, while protecting your health and your home.
Why a Moldy Cutting Board Is a Health Concern
Mold is more than a stain. It is a living growth of fungi that spreads by spores. Those spores can move into tiny cracks in your board or into the air you breathe.
Some key concerns include:
- Bacteria and mold together
Mold often appears where moisture and food particles sit. That same area can support harmful bacteria like Salmonella or E. coli. - Possible mycotoxins
Certain molds can produce toxins. These may irritate the gut or lungs, especially for sensitive people. - Higher risk for some groups
People with asthma, allergies, weak immune systems, pregnancy, young children, or older adults can be more vulnerable.
According to the USDA’s official food safety guidelines on cutting boards and cleanliness, surfaces that touch raw food should be kept very clean and well maintained to avoid cross-contamination and illness:
If mold has grown on your board, it means moisture stayed long enough to allow this growth. That is your sign to act quickly and carefully. ⚠️
1. Decide If Your Moldy Cutting Board Can Be Saved
Before you try any cleaning steps, you need to judge the condition of your board. Not every moldy cutting board is safe to rescue.
Ask yourself these questions:
- Is the mold only on the surface, or deep in cracks?
- Is the board very old, warped, or heavily grooved?
- Does it smell musty even after washing?
- Have you used it for years without replacement?
When You Can Usually Try to Save It
- Mold is in small patches, mostly on the surface.
- The board is fairly smooth, with only shallow knife marks.
- It is a solid, good-quality wooden or plastic board.
When You Should Replace It Instead
- Mold reaches into deep cracks or seams.
- The board is laminated, and layers are separating.
- You see dark, extensive streaks of mold inside the wood.
- Strong musty odor remains even after a thorough wash.
Here is a quick comparison to guide your decision:
| Situation | Likely Action | Reason |
|---|---|---|
| Light surface mold on smooth board | Try rescue | Mold likely limited to surface |
| Small board stains, no deep grooves | Try rescue | Easier to clean and sanitize |
| Deep cuts filled with dark mold | Replace | Mold and bacteria can hide beyond reach |
| Board warped, cracked, or splitting | Replace | Hard to sanitize and dry fully |
| Strong smell after cleaning attempt | Replace | Odor suggests deeper mold or trapped moisture |
If you feel unsure, it is safer to replace the board, especially if you live with high-risk family members. Your health is worth more than one cutting board. ❤️
2. Scrub Away Visible Mold Safely
Once you have decided the board might be saveable, start with a careful, thorough clean. This step is the foundation of every method that follows.
Protect Yourself First
Mold spores can irritate your eyes, skin, and lungs. Take a few simple precautions:
- Wear rubber or nitrile gloves.
- Use a mask if you are sensitive to mold.
- Open a window or work near good ventilation.
Step-by-Step Basic Cleaning
- Rinse with warm water
Rinse the board under warm running water to remove loose debris. - Apply dish soap generously
Use a mild, fragrance-free dish soap. Avoid harsh abrasive powders at this stage. - Scrub all surfaces
Use a stiff brush or non-scratch scrub pad.- Scrub both sides and all edges.
- Pay close attention to knife grooves and corners.
- Rinse thoroughly
Rinse under hot water so you wash away loosened mold and soap. - Pat dry with clean towels
Dry immediately with a clean, absorbent cloth. Do not leave it soaked.
After this first wash, you may still see stains. That is normal. The next steps focus on how to clean a moldy cutting board more deeply, kill remaining spores, and remove odors.
3. Disinfect with White Vinegar or Hydrogen Peroxide
Natural disinfectants can be effective when used correctly. They are often easier on lungs and skin than harsh chemicals. 🧴
These methods are suitable for most wooden and plastic boards.
Option A: White Vinegar Treatment
White distilled vinegar has mild antibacterial and antifungal properties.
You will need:
- White distilled vinegar (5% acidity)
- Clean spray bottle or cloth
- Scrub brush or sponge
Steps:
- Apply vinegar
- Spray undiluted vinegar over the entire board.
- Or soak a clean cloth with vinegar and wipe all surfaces.
- Let it sit
Leave the board wet with vinegar for 10–15 minutes.
This contact time allows vinegar to work on mold and bacteria. - Scrub again
Use a brush to re-scrub moldy areas and grooves. - Rinse and dry
Rinse under warm water and dry completely with a towel.
Stand the board upright in a rack to finish air drying.
Vinegar can leave a slight smell, but it usually fades within a few hours.
Option B: Hydrogen Peroxide Treatment
Hydrogen peroxide (3%) can help disinfect and lighten stains. It may be especially helpful on light plastic boards.
You will need:
- 3% hydrogen peroxide
- Clean cloth or spray bottle
- Gloves
Steps:
- Apply hydrogen peroxide generously
Coat the surface with peroxide using a spray or cloth. - Allow contact time
Let it sit for 10 minutes so it can work on microbes. - Scrub and rinse
Scrub the board again, then rinse well with warm water. - Dry thoroughly
Pat dry, then let the board air dry in a vertical position.
Never mix hydrogen peroxide with vinegar in a closed container. Use one method, rinse well, and then you may try the other if needed.
If you are still wondering how to clean moldy cutting board surfaces effectively, vinegar and peroxide are often the safest starting choices for most homes.
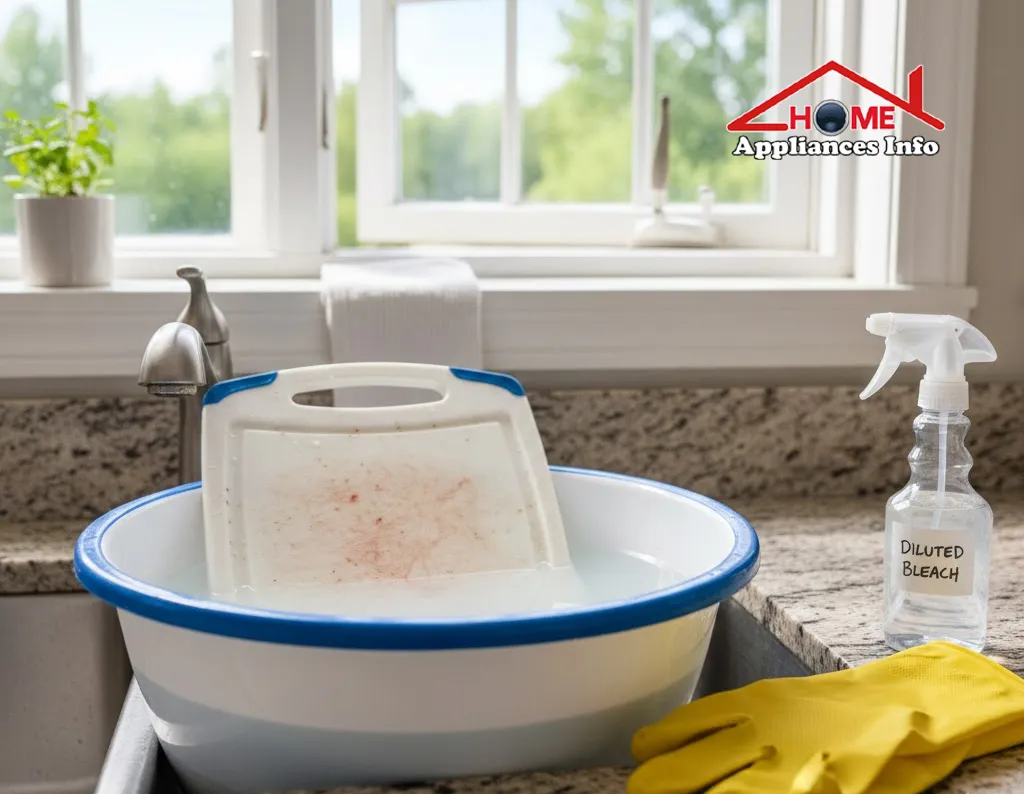
4. Use a Diluted Bleach Solution for Stubborn Cases
Sometimes, natural options are not enough, especially for thick plastic boards with stubborn mold stains. In these cases, a properly diluted bleach solution can help.
This method is best for plastic boards, not for valuable or delicate wooden boards.
According to many public health sources, including CDC guidance on mold in homes, bleach must always be diluted and used with good ventilation:
https://www.cdc.gov/mold
Safety First ⚠️
- Wear gloves and keep windows open.
- Never mix bleach with vinegar, ammonia, or other cleaners.
- Do not soak wooden boards in bleach for long periods.
Preparing the Bleach Solution
Use unscented household bleach (usually 5–6% sodium hypochlorite).
- Mix 1 tablespoon bleach in 1 gallon of cool water.
- Stir gently to combine.
Steps for Bleach Disinfection
- Wash the board first
Follow the basic cleaning steps from Section 2. - Apply the bleach solution
- Submerge the plastic board in the solution if possible.
- Or pour the solution over the surface in a sink or basin.
- Let it sit briefly
Allow contact for 2–5 minutes only. Longer is not necessary. - Rinse very thoroughly
Rinse under running water for several minutes to remove all bleach. - Dry completely
Towel dry, then let the board air dry standing upright.
If your moldy cutting board is wooden and valuable, consider professional refinishing before using bleach. Sanding and refinishing can remove surface layers where mold lives, but this is more advanced work and not always worth the cost.
5. Deodorize, Dry, and Protect the Board
Even after killing mold, some boards keep a slight musty smell or faint discoloration. That does not always mean active mold remains.
This step focuses on pulling out leftover odors and keeping the board dry and protected so mold does not return. 😌
Deodorize with Baking Soda
Baking soda is safe and gentle for both wooden and plastic boards.
You will need:
- Baking soda
- A few drops of water
- Scrub brush or cloth
Steps:
- Make a paste
Mix baking soda with a little water to form a thick paste. - Spread over the board
Cover stained or smelly areas with the paste. - Let it sit
Leave it for 15–30 minutes. - Scrub and rinse
Scrub gently, then rinse with warm water and dry thoroughly.
Sun-Dry When Possible
Sunlight can help dry your board more quickly. Light outdoor sun exposure also helps reduce odor.
- Place the board in indirect sunlight, not under harsh, direct midday sun.
- Limit time to 1–2 hours to avoid warping wooden boards.
Oil Wooden Boards to Protect Them
For wooden boards, a final treatment with food-safe oil helps prevent future moisture buildup.
Use food-grade mineral oil or a specialized cutting board oil. Avoid olive oil or other cooking oils that can go rancid.
Steps:
- Make sure the board is totally dry.
- Apply a thin layer of oil with a soft cloth.
- Let it soak in for a few hours or overnight.
- Wipe away any extra oil before storing.
This step does not only make the board look better. It also helps reduce the chance that your moldy cutting board problem will return, because a well-oiled surface absorbs water more slowly.
Long-Term Habits to Prevent Mold on Cutting Boards
Once you have gone through the work of rescue, prevention becomes your best friend. ✅
Here is how to reduce mold risks in daily life:
1. Wash Immediately After Use
- Wash boards right after cutting meat, fish, or produce.
- Do not let juices or scraps sit on the surface.
2. Avoid Soaking for Long Periods
- Do not leave boards sitting in a sink full of water.
- Long soaking encourages swelling and warping, especially in wood.
3. Dry Upright, Not Flat
- After washing, towel dry both sides.
- Store the board upright or in a rack for full air flow.
4. Give Boards Time to Rest
- Rotate between two or more boards.
- This allows each board to dry fully between uses.
5. Use Separate Boards for Different Foods
- One board for raw meat and poultry.
- Another for fruits, vegetables, and ready-to-eat foods.
This reduces cross-contamination and makes each board easier to keep clean.
6. Replace Old or Damaged Boards
Even the best care cannot save a board forever.
Replace your board if you notice:
- Deep, permanent grooves from knives.
- Warping or splitting.
- Recurring mold despite careful cleaning.
Knowing how to clean a moldy cutting board is helpful. But knowing when to let it go protects your health even more.
Frequently Asked Questions About Moldy Cutting Boards
1. Is it ever safe to use a board that had mold?
Yes, sometimes. If the mold was mild, only on the surface, and you cleaned and disinfected it thoroughly, many boards can be used again.
However, if you have a weakened immune system or severe allergies, replacement is often safer.
2. Can I save any wooden board with mold by sanding it?
Not always. Light surface mold on a thick, solid wooden board may respond to sanding plus deep cleaning.
But if mold has penetrated deep into cracks or the board smells musty inside, sanding may not reach all contaminated areas.
3. Is vinegar alone enough to kill all mold?
Vinegar can help reduce many mold species and bacteria when used correctly and with enough contact time.
However, it may not kill every type of mold. That is why visual inspection, odor checks, and board condition still matter.
4. Can a dishwasher remove mold from cutting boards?
A hot dishwasher cycle can help clean and sanitize dishwasher-safe plastic boards.
Many wooden boards should not go in the dishwasher. The intense heat and water can warp, crack, and shorten their life.
5. How often should I replace cutting boards?
There is no exact timeline, but many people replace plastic boards every few years.
Wooden boards can last longer with good care, but any board with deep grooves, cracks, or repeated mold issues should be replaced.
6. What if the mold stain never fully disappears?
A faint stain does not always mean active mold remains, especially after strong disinfection.
Focus on smell, texture, and board condition. If odor persists or the area feels soft, spongy, or damp, it is safer to replace it.
Conclusion: You Can Handle a Moldy Cutting Board Safely
A moldy cutting board feels alarming, but it does not always mean you must panic or throw everything away.
By checking the condition of your board, scrubbing it well, using safe disinfectants like vinegar, peroxide, or diluted bleach, and then drying and protecting it, you can often rescue a board with confidence.
At the same time, your health always comes first. If anything feels uncertain, if the mold is deep, or if your home includes vulnerable family members, choose replacement instead of risk.
Use the five proven methods in this guide whenever you face a mold-stained board. Build better daily habits so moisture and food fragments do not hang around. With these steps, you can keep your kitchen safer, cleaner, and more reassuring for everyone at your table. 🌿

1 Comment
Pingback: Samosa Maker Reviews: 7 Best Samosa Maker Machine & Triangle Samosa Maker Picks