
A broken hair dryer can ruin a rushed morning. It can also feel wasteful to replace a tool that may need only a simple fix. If you are searching for How to Repair Hair Dryer, this Step by Step Guide will help you troubleshoot common faults, repair safe-to-fix parts, and decide when replacement makes more sense.
Hair dryers live hard lives. They deal with heat, dust, hair, and bathroom humidity. Over time, switches wear out, vents clog, heating elements fail, and thermal safety parts trip. The encouraging part is this: many problems are easy to diagnose with basic tools and patience. This article walks you through the process in plain language, with practical tips, safety advice, and updated repair insights for 2026.
1. Understand How a Hair Dryer Works
Before you open the housing, it helps to know what is inside. Most dryers use the same small group of parts.
Core parts inside a hair dryer
- Power cord and plug
- On/off or multi-setting switch
- Fan motor
- Fan blade
- Heating element
- Thermal fuse or thermal cutout
- Air intake filter and vents
When the dryer turns on, electricity powers the motor and heating system. The fan pulls air in through the back. Air passes over the heating element, then exits through the nozzle.
If one part fails, the symptoms often point to the cause. For example:
- No power may mean a bad cord, plug, or switch.
- Weak airflow often means a clogged filter or damaged fan.
- Cold air may suggest a failed heating element.
- Sudden shutoff can signal overheating or a faulty thermal cutout.
This simple understanding makes the repair process less intimidating.
2. Start With Safety Before Any Repair
Any Step by Step Guide on appliance repair should begin here. A hair dryer mixes electricity and heat. That means safety comes first.
Safety checklist
- Unplug the dryer fully
- Let it cool for at least 20 minutes
- Never work on it near water
- Wear safety glasses if using compressed air
- Use insulated tools if possible
- Take photos before disconnecting wires
If the cord is melted, the casing is cracked near live wiring, or the smell of burning plastic is strong, stop and consider replacement. Some faults are not worth the risk.
You should also know that many modern dryers use tamper-resistant screws. A small precision screwdriver set may be needed.
3. Gather the Right Tools
You do not need a full workshop. Most basic repairs use simple household tools.
Basic tools for hair dryer repair
| Tool | Why You Need It | Optional or Essential |
|---|---|---|
| Phillips and flathead screwdrivers | Open the housing and remove parts | Essential |
| Multimeter | Test continuity and power flow | Essential |
| Needle-nose pliers | Handle clips and wires | Essential |
| Soft brush or toothbrush | Remove dust and lint | Essential |
| Compressed air | Clean vents and motor area | Optional |
| Emery paper | Clean electrical contacts | Optional |
| Replacement switch or fuse | Swap faulty components | As needed |
A multimeter matters most. It helps confirm whether a switch, fuse, or heating element is truly dead instead of only dirty or loose.
4. Diagnose the Problem Before Replacing Parts
Many people replace the wrong part first. That wastes money and time. Instead, work by symptoms.
Common symptoms and likely causes
Dryer will not turn on
Possible causes:
- Damaged power cord
- Faulty plug connection
- Broken on/off switch
- Blown thermal fuse
Dryer turns on but airflow is weak
Possible causes:
- Blocked intake filter
- Dust around fan
- Fan blade damage
- Worn motor
Dryer blows only cold air
Possible causes:
- Broken heating element
- Loose internal wire
- Failed heat selector switch
- Thermal cutout issue
Dryer shuts off after a few minutes
Possible causes:
- Overheating from blocked vents
- Weak motor
- Faulty thermal protector
- Internal debris reducing airflow
A quick symptom-based approach saves effort. It also makes this Step by Step Guide more practical for beginners.
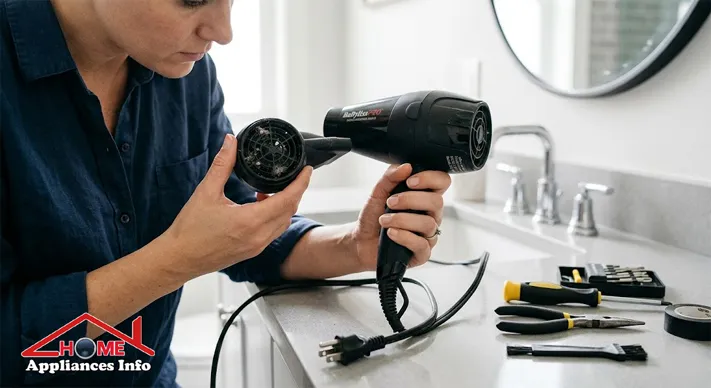
5. Inspect the Cord, Plug, and Exterior First
Always begin outside before opening the dryer.
What to check
- Look for cuts, kinks, or burn marks on the cord
- Wiggle the cord gently near the handle
- Inspect the plug prongs for discoloration
- Remove lint from the rear filter
A real-life example: if the dryer works only when the cord is bent a certain way, the internal cord connection may be loose or broken. In many low-cost dryers, replacing the cord is possible, but labor and parts may exceed the dryer’s value.
If the outside looks fine, move to internal inspection.
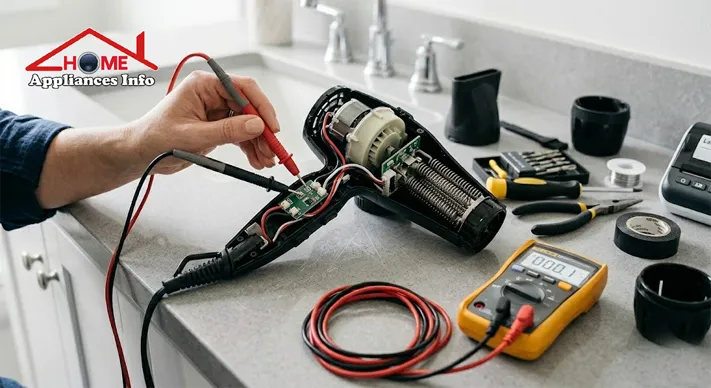
6. Open the Hair Dryer Housing Carefully
This is where patience pays off. Most dryers are held together with screws hidden near the handle or under labels.
How to open it safely
- Unplug the unit.
- Remove visible screws.
- Check for hidden screws under stickers or trim.
- Separate the housing gently with a plastic tool or fingernail.
- Take a photo of the internal layout.
Do not force the shell open. Plastic clips can snap easily. If the housing resists, look again for hidden screws.
Once open, inspect for:
- Loose wires
- Burn marks
- Dust buildup
- Cracked fan blades
- Corroded contacts
7. Repair a Faulty Switch
Switch problems are common, especially in dryers used daily. If settings feel loose or the dryer cuts in and out, the switch may be failing.
How to test and replace the switch
- Disconnect the dryer from power.
- Locate the switch assembly.
- Label or photograph wire positions.
- Use a multimeter to test continuity across switch terminals.
- If there is no continuity in the proper setting, replace the switch.
- Install the new switch with the same rating and layout.
- Reconnect wires exactly as before.
A switch is often worth replacing if the dryer is a quality model. Premium brands may justify the cost. Budget dryers may not.
For general appliance repair safety guidance, review the Consumer Product Safety Commission.
8. Clean or Repair the Fan and Motor
If your dryer sounds loud, rattles, or produces weak airflow, focus on the fan system.
Step-by-step fan and motor check
- Remove visible lint from the intake area.
- Brush dust from the motor housing.
- Spin the fan blade by hand.
- Check whether the blade is cracked or rubbing.
- Test motor continuity with a multimeter.
- Replace the motor if it fails continuity or smells burnt.
When cleaning is enough
Often, weak airflow is not a motor failure. It is simple blockage. Hair, dust, and product residue reduce intake and trap heat. That stresses the motor and thermal fuse.
You can use compressed air carefully to clear fine debris from vents and motor spaces. Hold the fan still while blowing air, so it does not overspin.
When replacement is better
If the motor is noisy, overheats quickly, or costs more than half the price of a new dryer, replacement may be the smarter choice.
9. Fix a Heating Element That Blows Cold Air
This is one of the most searched faults. The dryer runs, but there is no heat. In many cases, the heating element is broken or disconnected.
Signs of a failed heating element
- Airflow is normal but always cold
- Heat works only sometimes
- You see a broken coil or damaged ceramic support
- Multimeter shows no continuity
How to inspect and replace the element
- Open the housing.
- Locate the heating chamber.
- Remove the shield if present.
- Inspect the coil or ceramic element for breaks.
- Test continuity with a multimeter.
- Replace the element only with an exact compatible part.
Some newer dryers use ceramic systems rather than simple exposed wire coils. These can be safer and more efficient, but also less repair-friendly. Always match the model number when ordering parts.
For additional repair techniques and teardown examples, iFixit often features community-based guides for popular brands.
10. Check the Thermal Cutout or Thermal Fuse
A thermal cutout protects the dryer from overheating. If airflow drops or internal heat rises too high, this safety part may interrupt power.
Symptoms of thermal cutout trouble
- Dryer shuts off after a short use
- Dryer does not heat after overheating once
- Unit feels hotter than usual before failure
How to inspect it
- Locate the thermal fuse or cutout near the heating assembly.
- Check for discoloration or heat damage.
- Test continuity with a multimeter.
- Replace the part if continuity is absent.
Important note: never bypass a thermal fuse for regular use. It is a safety device, not a convenience part.
Sometimes the fuse fails because of another issue, like blocked vents or a weak motor. If you replace the fuse without fixing the root cause, the problem may return.
11. Clean Internal Contacts and Dust Buildup
Not every issue needs a new part. Dust, oxidation, and loose contacts often create symptoms that look more serious than they are.
Areas to clean
- Switch contacts
- Air intake screen
- Fan housing
- Heating chamber edges
- Wire terminals
Use:
- A dry soft brush
- Compressed air
- Light emery paper on metal contacts
Do not soak parts or spray liquid cleaners inside the dryer. Moisture and residue can create new faults.
The U.S. Department of Energy also supports energy-efficient appliance use, and keeping air pathways clean helps tools run more efficiently and safely.
12. Decide Whether Repair Is Worth It
A thoughtful Step by Step Guide should also help you decide when to stop.
Repair is usually worth it when:
- The dryer is from a reliable brand
- The fault is a switch, fuse, or cleaning issue
- Parts are affordable and available
- The casing and cord are still in good shape
Replacement is often smarter when:
- The motor is dead in a low-cost dryer
- The housing is cracked or warped
- There is major heat damage
- Repair cost exceeds half the price of a new unit
If your dryer is older and lacks modern safety features, replacing it may offer better protection and efficiency.
13. Reassemble and Test the Dryer Properly
After repair, put everything back in reverse order.
Reassembly checklist
- All wires returned to their original positions
- No screws left inside the housing
- Fan spins freely
- Housing clips and screws secure
- Rear filter reinstalled correctly
When testing:
- Plug it into a safe outlet.
- Turn it on at the lowest setting first.
- Listen for odd sounds.
- Check airflow.
- Test heat settings briefly.
If anything smells sharply burnt, unplug it at once and reopen the unit.
14. Prevent Future Hair Dryer Problems
Repair is helpful. Prevention is better.
Simple habits that extend dryer life
- Clean the rear vent every two weeks
- Never wrap the cord tightly around the handle
- Store it in a dry place
- Avoid blocking the air intake during use
- Let the dryer cool before putting it away
One practical example: a salon user who cleans the filter regularly may get years more life from the same dryer than someone who never checks the vent.
This Step by Step Guide is not only about fixing problems. It is also about avoiding them.
FAQs
1. Can I repair a hair dryer at home?
Yes, many common issues are DIY-friendly. Cleaning vents, testing switches, and replacing fuses are common home repairs.
2. Why does my hair dryer run but not heat?
The heating element, thermal fuse, or heat switch may have failed. A multimeter can help confirm the exact cause.
3. Is it safe to use a hair dryer after it overheats?
Not until you inspect it. Overheating may damage the thermal fuse, motor, or internal wiring.
4. How long should a hair dryer last?
A quality dryer can last several years. Lifespan depends on usage, maintenance, and airflow cleanliness.
5. When should I replace instead of repair?
Replace it if the motor is dead, the casing is damaged, or repair costs are too high compared with a new dryer.
6. Do newer dryers use different heating systems?
Yes. Many newer models use ceramic or advanced heating designs, which may be safer but sometimes harder to repair.
Conclusion
Learning How to Repair Hair Dryer problems can save money, reduce waste, and keep a useful tool out of the trash. In many cases, the fix is simple: clean the vents, test the switch, inspect the heating element, or replace the thermal fuse. By following this Step by Step Guide, you can approach repairs with more confidence and less guesswork.
If your dryer shows serious heat damage or unsafe wiring, choose replacement over risk. But if the problem is minor, a careful repair can give your dryer a second life. That is good for your budget and better for the planet 🌍
References
- Consumer Product Safety Commission: https://www.cpsc.gov/
- iFixit Repair Community: https://www.ifixit.com/
- U.S. Department of Energy: https://www.energy.gov/