
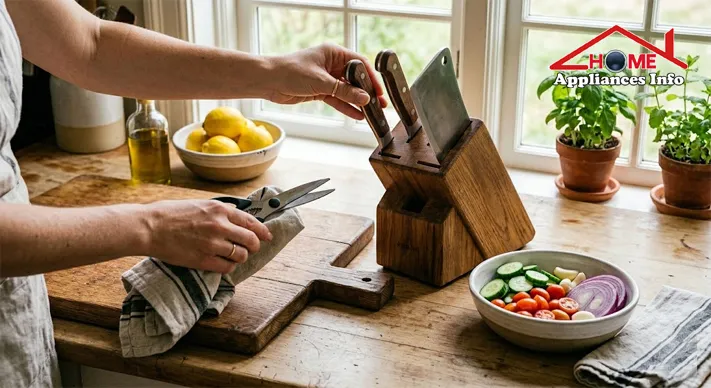
A well-run kitchen rarely depends on one blade alone. Kitchen scissors often become the quiet hero, handling quick snips, trimming herbs, cutting poultry, and opening food packages with less fuss than a full-size knife. But they work best when paired with the right tools. A bone cleaver tackles hard cuts, a slicing knife creates clean, even portions, and a fruit knife handles delicate peeling and trimming with control. When you understand what each tool does best, prep becomes faster, safer, and far less stressful.
Many home cooks use the wrong tool out of habit. That can damage ingredients, dull blades, and increase the risk of slips. The better approach is simple: match the tool to the task. Below, you will find nine practical ways to use kitchen shears and companion knives wisely, plus care tips, a comparison table, and answers to common questions.
Why kitchen tools matter more than most people think
Cooking feels smoother when your tools match your ingredients. Cutting chicken joints with a delicate knife is frustrating. Peeling an apple with a heavy cleaver feels awkward. The right tool reduces effort and improves precision.
Think of your kitchen tools like footwear. You would not hike in dress shoes. In the same way, each blade has its proper place.
1. Use kitchen scissors for fast, everyday prep
Kitchen scissors shine during daily cooking because they reduce setup time. You can snip directly into a bowl, pan, or plate. That saves both time and cleanup.
Common jobs for kitchen scissors include:
- Cutting green onions into soup
- Snipping cilantro, parsley, or chives
- Trimming fat from chicken
- Cutting dried chilies
- Opening food packaging
- Portioning bacon or noodles
This is where kitchen shears often outperform standard knives. Their grip gives you control, especially for small, repetitive cuts.
Real-life example
If you make pizza at home, scissors can cut basil, trim parchment, and even slice the pizza itself after baking. One tool handles three small jobs quickly.
2. Use kitchen shears to break down poultry safely
Whole chickens can intimidate home cooks. Yet kitchen shears make the process easier. They are especially useful for removing the backbone, trimming wing tips, and separating smaller bones.
For tasks like spatchcocking a chicken, shears are often more stable than a chef’s knife. You cut along the bone instead of forcing a straight blade through it.
Tips for safer poultry prep:
- Place the bird breast-side down on a stable board
- Use firm, controlled pressure
- Cut beside the backbone, not through the thickest bone
- Wash and dry the shears immediately after use
For food safety guidance, review the USDA’s recommendations on handling raw poultry at USDA.
3. Reach for a bone cleaver when hard bones are involved
A bone cleaver is built for force. It has a thick, heavy blade and a wider cutting angle. That design helps it chop through hard materials that would damage thinner knives.
Use a bone cleaver for:
- Chicken or duck bones
- Pork ribs in sections
- Hard squash with thick skin
- Large cuts that need splitting
Never use a slicing knife for these jobs. Its thin edge is designed for clean slicing, not impact.
Safe technique matters
When using a bone cleaver, keep the ingredient flat and stable. Bring the blade down in the direction of the blade plane. Do not twist mid-cut. Twisting can cause slipping or edge damage.

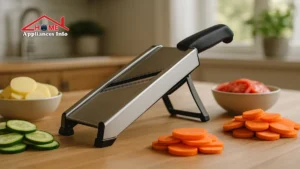
4. Choose a slicing knife for thin, clean cuts
A slicing knife is lightweight and narrow, with a sharp, fine edge. It is made for precision. When you want neat slices instead of rough cuts, this knife does the job beautifully.
Best uses include:
- Roast beef or turkey
- Cooked chicken breast
- Smoked salmon
- Ham
- Soft vegetables in even slices
Its long blade reduces tearing. That matters when presentation counts, such as holiday platters or meal prep containers.
What not to do
Do not use a slicing knife on frozen foods or hard bones. The blade is too thin for that kind of pressure.
A simple rule helps here: if the ingredient resists the knife strongly, switch tools.
5. Use a fruit knife for delicate peeling and trimming
A fruit knife is small, light, and easy to maneuver. It works well for peeling apples, hulling strawberries, trimming citrus, and shaping garnishes.
This knife is ideal when your hand needs control more than force.
Tasks suited to a fruit knife:
- Peeling apples and pears
- Segmenting oranges
- Removing potato eyes
- Trimming blemishes from produce
- Cutting small fruits for lunch boxes
The short blade helps you stay close to the surface. That means less waste and neater results.
A practical kitchen example
If you prepare fruit for children, a fruit knife often feels safer and more accurate than a large chef’s knife. You can work slowly and precisely.
6. Use detachable kitchen scissors for easy cleaning
Some apart into two separate pieces. This design matters more than many people realize. Food residue can collect near the pivot, especially after cutting meat, fish, or sticky herbs.
Detachable scissors offer several advantages:
- Easier deep cleaning
- Faster drying
- Better hygiene
- Access to both blades for sharpening
- Extra versatility in some models
This is especially helpful if you often cut raw chicken or fish. Hidden moisture around the hinge can encourage odor and buildup.
For broader kitchen hygiene advice, FoodSafety.gov is a reliable reference.
7. Understand multifunctional kitchen scissors before buying
Not all shears are basic. Some include built-in tools such as:
- Bottle openers
- Nut crackers
- Fish scalers
- Peelers
- Serrated grip sections for lids
These added functions can be useful in smaller kitchens. But they should not distract from the main requirement: sharp, comfortable cutting performance.
When shopping, look for:
- Comfortable handles
- Stainless steel blades
- Secure hinge construction
- Optional blade separation
- Good grip, even with wet hands
A multifunction model is helpful if the core scissors still cut cleanly. If not, extra features become clutter.
8. Match the angle and blade type to the task
Knife performance depends on shape, weight, and edge angle. That may sound technical, but the idea is simple. Thin edges cut cleanly. Thick edges handle force better.
Here is a quick comparison:
| Tool | Best Use | Blade Style | Avoid Using It For |
|---|---|---|---|
| Kitchen scissors | Herbs, poultry trimming, packaging, noodles | Dual short blades, hand-powered | Large hard bones |
| Kitchen shears | Fish bones, trimming meat, snipping vegetables | Stronger scissor build | Heavy chopping |
| Bone cleaver | Hard bones, ribs, dense ingredients | Thick, heavy, wide angle | Fine slicing or peeling |
| Slicing knife | Roasts, cooked meats, even thin cuts | Long, thin, sharp blade | Bones and frozen food |
| Fruit knife | Peeling, trimming, small fruit work | Small, light, agile blade | Hard chopping |
A useful sharpening guideline is this:
- Slicing knife: around 15°
- Cleaver-type blades: around 24°
Sharper is not always better for every tool. A thin edge cuts beautifully, but chips faster under force.
9. Care for every blade to make it last longer
Good tools can last years with basic care. Neglect, however, shortens their life quickly.
Simple maintenance habits
- Clean each tool after use
- Dry it fully before storing
- Keep blades in a dry, ventilated space
- Avoid leaving tools near sinks or stoves
- Sharpen regularly
- Keep all sharp tools away from children
Do not test blade sharpness with your finger. Use paper, tomato skin, or a visual check instead.
Also avoid scraping marble, ceramic, or other very hard surfaces with blade edges. That dulls or chips them faster than most people expect.
How to decide which tool to use first
If you are standing in the kitchen and wondering what to grab, ask three quick questions:
Is the job delicate?
Use a fruit knife or slicing knife.
Is the ingredient tough or bony?
Choose a bone cleaver or sturdy kitchen shears.
Is the task quick and repetitive?
Reach for kitchen scissors.
This small habit reduces frustration. It also protects your tools from unnecessary wear.
Common mistakes people make with scissors and knives
Even experienced cooks slip into poor habits. These are the most common ones:
- Using one knife for every job
- Cutting bones with a thin blade
- Leaving scissors wet in the sink
- Storing blades loose in drawers
- Ignoring dullness until cutting becomes dangerous
- Using too much force instead of switching tools
A dull edge often causes more accidents than a sharp one. People push harder, the tool slips, and fingers get too close.
FAQs
1. Are kitchen scissors and kitchen shears the same?
Often, yes. The terms are used interchangeably. Sometimes kitchen shears refers to heavier-duty models.
2. Can kitchen scissors cut chicken bones?
Some can handle small poultry bones. For harder bones, use specialized bone-cutting scissors or a bone cleaver.
3. What is a slicing knife best used for?
A slicing knife is best for thin, even cuts of cooked meat, fish, and similar foods.
4. Do I need a fruit knife if I already own a chef’s knife?
A fruit knife adds control for peeling and small trimming jobs. It is not essential, but it is very useful.
5. How often should I sharpen my knives?
That depends on use. Home cooks often benefit from sharpening every few months, with regular honing in between.
6. Can detachable kitchen scissors be safer?
Yes. They are easier to clean thoroughly, which improves hygiene and reduces trapped residue.
Final thoughts
The smartest kitchen setups are not always the most expensive. They are the most intentional. Kitchen scissors handle quick daily cuts with speed and control. A bone cleaver takes on heavy-duty chopping. A slicing knife creates clean presentation, while a fruit knife brings finesse to small produce work. When each tool is used for its intended purpose, cooking feels more efficient, more enjoyable, and much safer.
If your current prep routine feels clumsy, start with one change. Use kitchen shears for trimming and snipping, then save your knives for the jobs they were designed to do. Small upgrades in technique often create the biggest difference in the kitchen. 🍎
References
- USDA. Safe handling and preparation guidance: USDA
- U.S. government food safety resource: FoodSafety.gov