

To support our research and detailed appliance reviews, we may earn a small commission from qualifying purchases made through our links, at no extra cost to you. As an Amazon Associate, I earn from qualifying purchases.
To support our research and detailed appliance reviews, we may earn a small commission from qualifying purchases made through our links, at no extra cost to you. As an Amazon Associate, I earn from qualifying purchases.
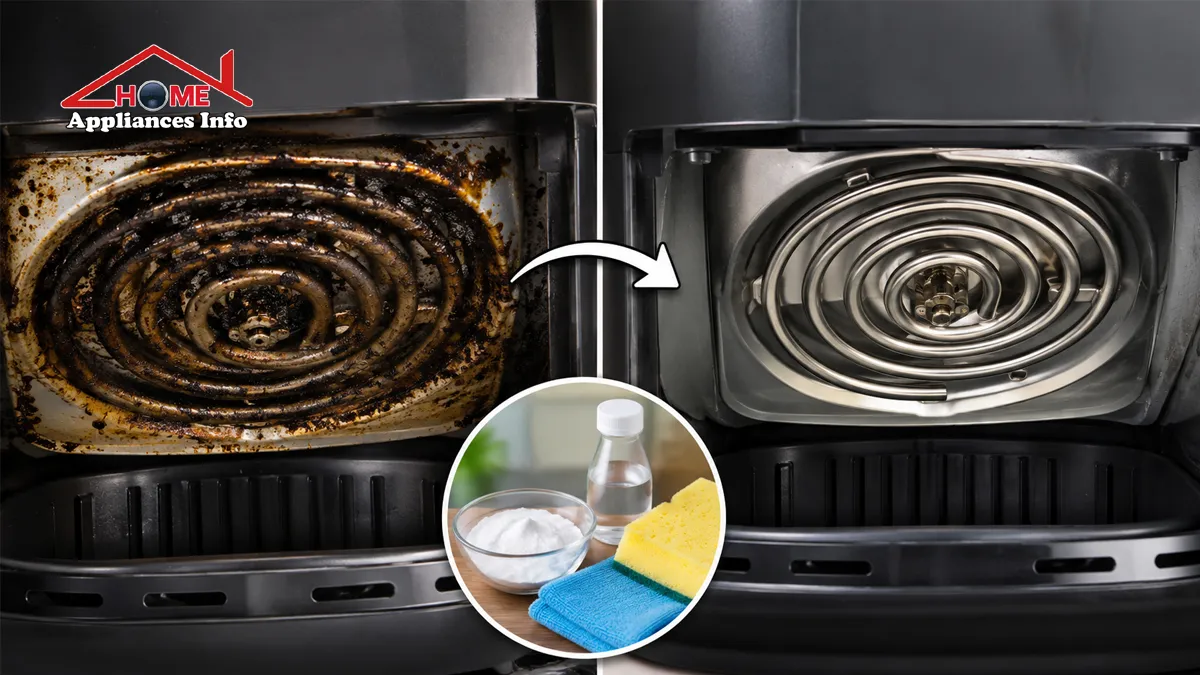
Many people regularly wash the basket and crisper tray but rarely look at the area above the food chamber. That is where grease splatter, tiny food particles, and burnt residue can gradually collect around the heating coil.
If you are wondering how to clean air fryer heating element safely, the basic approach is simple: unplug the appliance, let it cool completely, access the heating area carefully, remove loose debris, and use gentle cleaning tools with minimal moisture. Never soak, scrape aggressively, or dismantle the heating element unless your manufacturer specifically permits it.
Regular cleaning matters because accumulated grease can contribute to unpleasant odors and smoke. The exact method can vary between brands and models, so your appliance manual should always take priority over general advice.
Why the Heating Element Needs Attention
Air fryers circulate very hot air around food. When you cook bacon, chicken wings, sausages, burgers, or other fatty foods, tiny droplets of oil can travel upward and settle on the ceiling and heating element.
Over time, this may leave behind:
- Oil splatter
- Sticky grease
- Hardened food residue
- Darkened burnt deposits
- Lingering cooking odors
The goal is not to scrub the coil until it looks brand new. A heating element is more sensitive than a removable basket, so the safer approach is to loosen and lift residue gradually.
For general day-to-day care, the same habits that help prevent odors in an air fryer can also reduce heavy grease buildup over time. If your appliance has developed an unusual smell, our guide on why an air fryer can smell like plastic and how to deal with it may help you distinguish normal residue from a problem that needs further attention.
How to Clean Air Fryer Heating Element in 5 Easy Steps
Step 1: Unplug the Air Fryer and Let It Cool Completely
Start with safety.
Switch the appliance off, unplug it from the wall outlet, and wait until it is completely cool. Then remove the basket, tray, crisper plate, rack, or other removable accessories.
The main appliance contains electrical components and should never be immersed in water. Ninja’s official maintenance guidance similarly instructs users to unplug the unit before cleaning and never immerse the main unit in water or another liquid.
Do not rush this step. Cleaning a warm heating element increases the risk of burns and can make handling the appliance more difficult.
Step 2: Access and Inspect the Heating Element
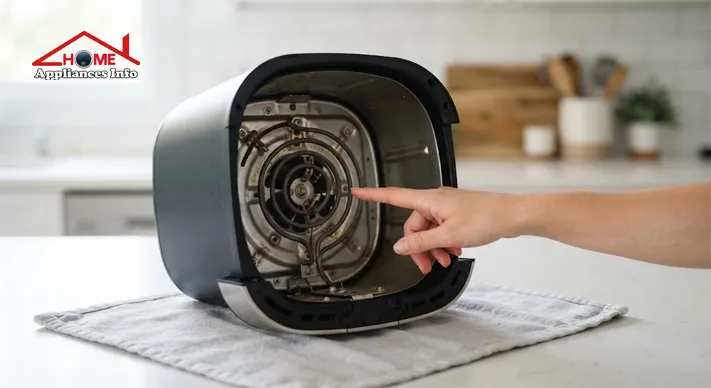
In many basket-style air fryers, the heating element sits at the top of the cooking chamber.
Depending on your model, you may be able to improve access by carefully tilting or turning the appliance upside down. However, do this only if your manufacturer’s instructions allow it.
Philips, for example, provides instructions for certain Airfryer models that involve placing the appliance upside down on a soft cloth to reach the heating element. That does not mean every air fryer should automatically be handled this way, so check your own manual first.
Once you can see the area clearly, inspect it before adding any moisture.
Look for:
- Loose crumbs
- Light oil splatter
- Sticky grease
- Dark baked-on deposits
- Food particles caught near the coil
Use a dry soft brush or dry microfiber cloth to remove loose debris first.
Never force the coil, pull on it, or attempt to remove it unless your specific manufacturer instructions explicitly permit disassembly.
Step 3: Wipe the Heating Coil Gently
For ordinary grease and light residue, use one of the following:
- A microfiber cloth
- A soft non-abrasive sponge
- A soft-bristled cleaning brush
- A clean, soft toothbrush for tight accessible spaces
The cloth should be slightly damp rather than soaking wet.
Gently wipe accessible sections of the heating element and the surrounding interior. Work slowly instead of pressing hard against the coil.
Manufacturer guidance from Philips recommends a soft sponge for cleaning the inside and heating element and advises against steel wire brushes or hard-bristle brushes that may damage the element’s coating.
Avoid doing this
Do not:
- Pour water into the appliance
- Soak the heating element
- Use steel wool
- Use metal scrapers
- Scrub aggressively
- Bend or pull the coil
A gentle cleaning method may take a little longer, but that is preferable to damaging a coated surface or nearby components.
How to Remove Baked-On Grease From Air Fryer Heating Element
Fresh grease usually wipes away more easily than residue that has been repeatedly heated. Over time, oil can become darker, stickier, and harder to remove.
If you need to know how to remove baked on grease from air fryer heating element, start with the mildest approach rather than immediately reaching for a harsh chemical cleaner.
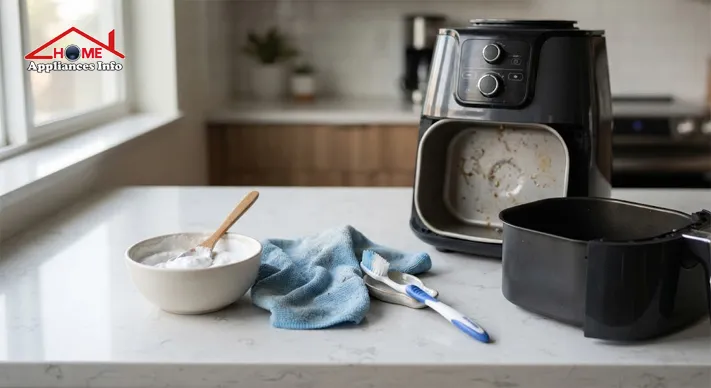
Try a small baking soda paste
For stubborn residue, mix baking soda with a small amount of water until you have a thick paste rather than a runny mixture.
Use a small amount on accessible dirty areas with:
- A soft cloth
- A cotton swab
- A soft-bristled brush
Be careful not to push the paste into vents, electrical openings, or inaccessible areas behind the heating assembly.
Allow the residue to soften briefly, then loosen it gently. Avoid aggressive scraping.
Afterward:
- Remove visible baking soda residue with a clean, slightly damp cloth.
- Wipe again if necessary.
- Allow the entire area to dry thoroughly before using the appliance.
Baking soda is best treated as a targeted option for stubborn residue, not something that must be used during every cleaning session.
If the buildup is extremely heavy or appears to be coming from an inaccessible part of the appliance, repeated DIY cleaning may not be appropriate. Check the manufacturer’s support guidance instead of trying to dismantle the unit.
Air Fryer Heating Coil Cleaning With Baking Soda
Air fryer heating coil cleaning baking soda methods are popular because baking soda provides mild abrasive action when used carefully. However, more paste and more scrubbing do not automatically produce better results.
A sensible approach is to match the cleaning method to the problem.
| Type of buildup | Recommended approach |
|---|---|
| Light grease | Slightly damp soft cloth |
| Loose food particles | Soft dry brush |
| Sticky residue | Soft sponge or non-abrasive brush |
| Stubborn baked-on grease | Small amount of baking soda paste, if appropriate for the model |
| Heavy or inaccessible buildup | Check manufacturer guidance |
For light grease, start simple. For stubborn grease, use the baking soda paste sparingly. If residue remains after one gentle attempt, repeating the process carefully is generally safer than switching immediately to harsh oven chemicals or abrasive tools.
This gradual approach is part of sensible air fryer heating element maintenance.
Can You Spray Degreaser on Air Fryer Heating Element?
Can you spray degreaser on air fryer heating element? The safest general answer is not to spray cleaner directly onto the heating element unless your appliance manufacturer specifically says that method is safe.
Direct spraying can send excess liquid into places you cannot see, including openings near electrical components.
A more controlled approach is usually to:
- Apply an appropriate cleaner to a cloth rather than spraying freely inside the appliance.
- Follow the cleaner’s instructions.
- Make sure the product is suitable for the relevant appliance surfaces.
- Remove cleaner residue thoroughly.
- Follow the manufacturer’s instructions for your exact model.
Philips notes that stronger liquid degreasers may be used for stubborn grease on certain removable pan and basket components according to the product instructions. That guidance should not automatically be interpreted as approval to spray degreaser directly onto every heating element.
This distinction matters. Removable baskets and trays may have different materials and cleaning instructions than the heating assembly.
How to Clean Heating Element on Ninja Air Fryer
If you are searching for how to clean heating element on Ninja air fryer, remember that Ninja makes several basket-style air fryers, dual-zone models, ovens, and other designs. Access to the heating area can therefore differ.
The basic process is similar:
- Turn off and unplug the appliance.
- Allow it to cool completely.
- Remove the basket, crisper plate, trays, or other removable parts.
- Check the manual for your specific model.
- Remove loose food particles with a suitable soft cleaning brush.
- Clean accessible residue gently.
- Wipe away remaining cleaning residue.
- Allow all parts to dry thoroughly before use.
Ninja’s official guidance for the AF100UK states that the unit should be unplugged before cleaning, the main unit should never be immersed, and the heating element can be cleaned with a cleaning brush to remove food residues. It also advises against harsh oven or grill cleaners.
The important point is not to assume that every Ninja model has identical cleaning instructions.
Step 4: Clean the Surrounding Interior
The heating coil may not be the only source of grease or odor.
While the appliance is cool and unplugged, inspect the:
- Ceiling of the cooking chamber
- Interior walls
- Corners
- Areas around accessible grease shields or protective surfaces
Use a soft cloth and a cleaning method appropriate for the appliance.
Sometimes people focus entirely on the heating element when the actual burnt smell is coming from grease on the ceiling, crumbs below the basket, or food residue elsewhere in the chamber.
Regular cleaning of removable parts also makes this job easier. If you are comparing models and considering how easy they are to maintain, our Philips Air Fryer review discusses everyday cleaning considerations such as removable baskets and crisp plates.
Step 5: Wipe, Dry, and Reassemble
Once the visible residue has been removed, use a clean cloth to wipe away any remaining moisture or cleaning material.
Then allow the appliance to dry thoroughly.
Before using it again, make sure:
- No visible cleaning residue remains
- The heating area is dry
- Removable parts are dry
- The appliance is reassembled correctly
Philips and Ninja both emphasize cleaning and drying procedures for appliance components, with Ninja specifically advising users to air-dry or towel-dry parts after cleaning.
Do not plug in or operate the appliance while moisture remains where it should not be.
What Not to Use on an Air Fryer Heating Element
The wrong cleaning tool can create more problems than the grease itself.
Avoid:
- Steel wool
- Steel wire brushes
- Metal brushes unless specifically approved by the manufacturer
- Sharp knives or scrapers
- Harsh oven cleaners
- Large amounts of water
- Abrasive powders
- Uncontrolled spraying into electrical areas
- Dishwasher cleaning of the main appliance
- Immersing the air fryer body in water
Official manufacturer guidance supports a cautious approach. Philips warns against hard or steel wire brushes on the heating element, while Ninja advises against harsh oven or grill cleaners and against immersing the main unit.
How Often Should You Clean the Heating Element?
There is no single schedule that suits every household because cooking habits make a difference.
After every use
Clean the removable components as appropriate:
- Basket
- Crisper plate
- Tray
- Easily accessible grease
Every few uses or as needed
Inspect:
- The interior chamber
- The upper interior surface
- The heating element area
Deep clean sooner if you notice
- Smoke during normal cooking
- A persistent burning smell
- Visible grease splatter
- Burnt food residue
- Heavy buildup inside the chamber
Fatty foods generally create more splatter than foods cooked with little added oil.
Regular maintenance is usually easier than waiting until the appliance needs a major air fryer deep cleaning.
Common Mistakes That Make Cleaning Harder
Cleaning while the appliance is hot
Always let it cool completely. Heat makes cleaning less safe and can make residue harder to handle comfortably.
Using too much water
A heating element is part of an electrical appliance. A dripping sponge or soaking-wet cloth is unnecessary and can create problems.
Spraying cleaner everywhere
Controlled application gives you more control over where moisture and cleaning products go.
Using steel wool
Aggressive abrasives can scratch or damage coated surfaces.
Forgetting to remove cleaner residue
Any cleaning product left inside the cooking chamber should be removed according to the cleaner’s instructions and the appliance manufacturer’s guidance.
Using the air fryer before it is dry
Give the appliance adequate time to dry completely before plugging it back in.
FAQs
Can I use baking soda to clean my air fryer heating element?
A small amount of baking soda paste may help loosen stubborn baked-on residue on accessible areas. Use it sparingly, avoid vents and electrical openings, and check your manufacturer’s instructions first.
How do I remove baked-on grease from an air fryer heating element?
Start with gentle wiping and a soft brush. If residue remains, a small amount of baking soda paste may help loosen it. Remove all residue afterward and allow the appliance to dry completely.
Can you spray degreaser on an air fryer heating element?
Avoid spraying degreaser directly onto the heating element unless your manufacturer specifically approves that method. Applying a suitable cleaner to a cloth provides more control.
Can I use a toothbrush to clean an air fryer heating coil?
A clean, soft-bristled toothbrush can help reach tight accessible areas. Use very light pressure and never bend, pull, or force the heating element.
Why does my air fryer smoke after cleaning?
Smoke may come from remaining grease, burnt food residue, or cleaning residue. Stop using the appliance if you notice an unusual electrical smell, sparks, melting, or other signs of malfunction, and consult the manufacturer.
Do I need to clean the heating element after every use?
Usually not. Cleaning removable parts after use and inspecting the heating area regularly is a more practical routine. Deep cleaning frequency depends largely on how often you cook greasy foods.
Final Thoughts
Learning how to clean air fryer heating element safely does not usually require aggressive chemicals or complicated equipment.
The basic sequence is straightforward:
Unplug → Cool → Access carefully → Remove loose debris → Clean gently → Treat stubborn residue carefully → Wipe → Dry completely.
For most households, regular inspection and gentle cleaning can prevent grease from becoming heavily baked onto the heating area. The biggest mistake is treating the coil like a removable baking tray and scrubbing it aggressively.
If your model’s instructions differ from general cleaning advice, the manufacturer’s manual should always take priority. A careful approach protects the appliance while helping keep your cooking chamber cleaner and free from accumulated grease and food residue.
References
- Philips — How to Clean My Philips Airfryer
- Ninja Customer Service — AF100UK Ninja Air Fryer FAQs and Cleaning & Maintenance Guidance
- Philips — How to Clean the Inside and Heating Element of My Airfryer

🍳 HOME & KITCHEN APPLIANCE EXPERT
Sidra Altaf
Home & Kitchen Specialist | Product Evaluator & Appliance Reviewer

🏠 Home Essentials
⚖️ Product Comparisons
⚡ Energy & Efficiency
Sidra Altaf is a seasoned expert in home and kitchen appliances with over 5 years of hands-on experience in the field. Passionate about helping families make smarter choices, she specializes in reviewing, comparing, and recommending appliances that bring convenience, efficiency, and innovation into everyday living. Her deep knowledge of product functionality, durability, and design makes her a trusted voice for anyone looking to upgrade their home.