

To support our research and detailed appliance reviews, we may earn a small commission from qualifying purchases made through our links, at no extra cost to you. As an Amazon Associate, I earn from qualifying purchases.
To support our research and detailed appliance reviews, we may earn a small commission from qualifying purchases made through our links, at no extra cost to you. As an Amazon Associate, I earn from qualifying purchases.
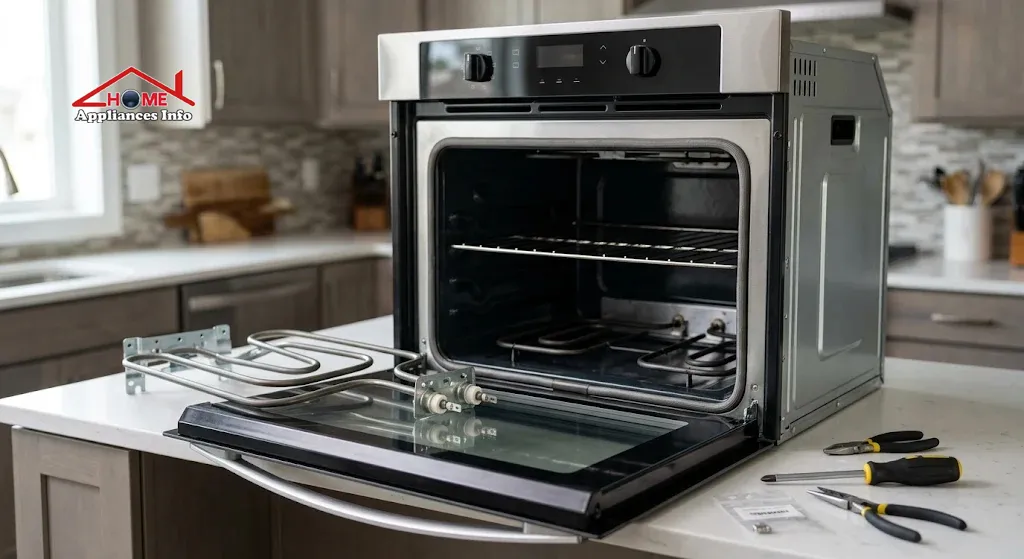
A failed bake element rarely announces itself. More often you notice a casserole still cold in the middle after an hour, or a preheat that never seems to finish. Oven element replacement is one of the more manageable electric oven repairs: the part is modest in price, and on many models it is held in by a couple of screws. It is also work on a 240-volt appliance, so two questions come first. Is the element really the problem, and should you be the one replacing it?
The short version: confirm which element failed, match the new part to your exact model number, cut power at the breaker, and expect a professional job to run roughly $150 to $400, according to Angi’s 2026 oven repair data. Doing it yourself costs only the part, provided the diagnosis is right.
What an Oven Heating Element Does
An electric oven heating element is a resistance heater. Current passes through a wire sealed inside a metal sheath, and the wire’s resistance turns electrical energy into heat. Most ovens use more than one element, and the layout depends on the manufacturer and model.
- Bake element: at the bottom of the cavity, either exposed or hidden under the oven floor. It does most of the work in conventional baking.
- Broil element: near the ceiling. It supplies the intense top heat used for broiling and browning.
- Convection element: a ring around the rear fan on convection models, usually behind an interior panel. The fan moves its heat around the oven.
Not every oven has all three, and a failure often affects only one cooking mode. An oven can broil perfectly well while its bake element is dead, which is a useful clue when you start diagnosing.
Signs Your Oven Element Needs Replacing
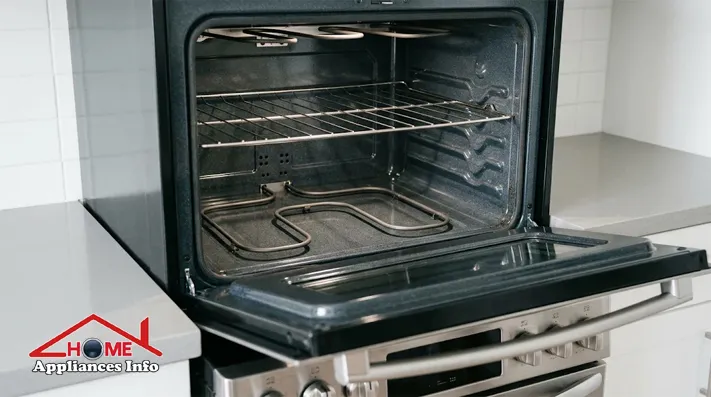
The most common symptom is an oven that heats slowly, heats weakly, or does not heat at all. Others are subtler:
- Food that cooks unevenly, with pale bottoms or raw centers.
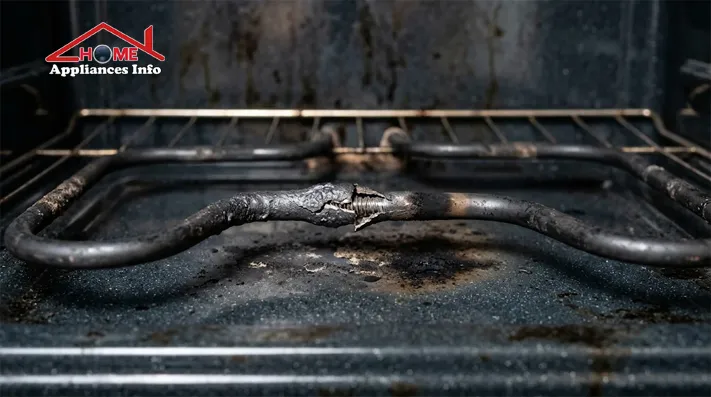
- A visible crack, blister, bulge, or burn mark on an exposed element.
- An element that does not glow orange or red when it should. This is not conclusive on its own, because elements cycle on and off and hidden bake elements cannot be seen.
- A popping sound, sparks, or an electrical burning smell.
- A breaker that trips when one particular mode is selected.
The last three call for caution rather than curiosity. Do not keep resetting a breaker that trips whenever the oven runs. The Electrical Safety Foundation International advises hiring a qualified, licensed electrician for electrical work and shutting off the circuit breaker before working on any circuit. A repeatedly tripping breaker is a reason to disconnect the oven and call for service.
Why Oven Elements Fail
Age is the usual cause. An element expands and contracts through thousands of heating cycles, and the resistance wire inside eventually fatigues and breaks. Other causes are worth knowing because some are avoidable:
- Insulation breakdown. The material separating the wire from the outer sheath can degrade, letting current leak to the oven body. This is the sort of fault that trips breakers.
- Physical damage. A sheet pan dragged across an exposed element can dent or split the sheath.
- Spills and residue. Heavy grease or boiled-over food can damage the sheath or the terminals.
- Loose or burned terminals. A corroded connector can stop an element from receiving power even though the element itself is fine.
That last point matters later: damaged wiring does not automatically mean the element is bad, and replacing the element will not fix a burned connection.
Rule Out Other Causes First
A cold oven does not prove the element has failed. Several components produce similar symptoms, and replacing the wrong part is the most common way a simple repair becomes an expensive one.
| What you notice | What to look at first |
|---|---|
| Bake fails, broil works | Bake element or its wiring |
| Heats, but won’t hold temperature | Temperature sensor, thermostat, or control |
| No heating in any mode | Shared power supply, thermal fuse, control board |
| Convection fan silent | Fan motor, not necessarily the ring element |
| Breaker trips in one mode only | Element or wiring insulation fault |
Testing the element means checking continuity or resistance with a multimeter, and only with the oven disconnected, cool, and confirmed de-energized. Never take electrical measurements on a live oven. An open circuit suggests a broken internal wire, but a continuity reading alone cannot show whether the insulation is sound, so someone qualified may need to go further. If you are not comfortable with this, leave the diagnosis to a technician. For related upkeep and troubleshooting, the How-To & Maintenance Tips section covers other household appliances.
Choosing the Right Replacement Element
Elements are model-specific, so a part that looks right can still be wrong. Start with your oven’s model number, which is printed on a label whose location varies. Whirlpool’s product help, for example, says to look on the frame of the oven for ranges, and other makers use the door frame or the area behind a drawer. Then confirm:
- The part number against the manufacturer’s parts diagram for your model.
- Voltage and wattage, which should match the original.
- Length, shape, and mounting bracket positions.
- Terminal and connector design.
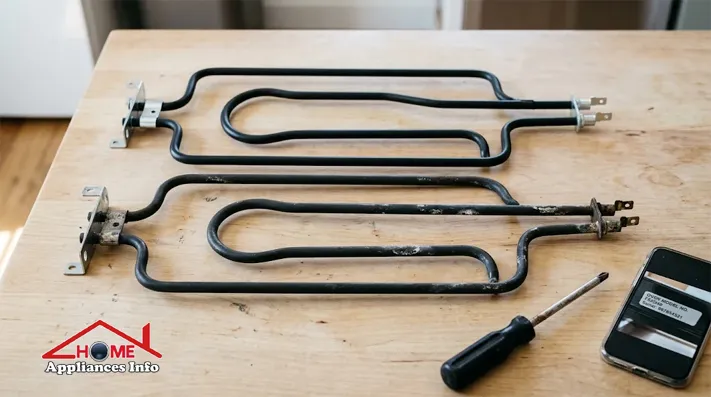
Genuine manufacturer parts, or compatible parts explicitly listed for your exact model, are the safe choice. Hold the old and new elements side by side before installing anything.
Tools are modest: a screwdriver set matched to your screws, pliers, a flashlight, work gloves for sharp metal edges, and a phone camera. A multimeter is useful if you are qualified to use one. Gloves help with cuts and scrapes but do nothing to make live electrical work safe.
Oven Element Replacement in 7 Steps
Treat this as a general overview, not a universal procedure. Exposed bake elements, hidden bake elements, broil elements, and convection rings are all reached differently, so follow your manufacturer’s model-specific instructions where they exist.
Step 1: Cut the power. Switch the oven off, then turn off its circuit breaker. If it is plug-connected and the plug is safely reachable, unplug it as well. Many built-in ovens are hardwired, so turning off the control panel is not enough. Let the oven cool completely and confirm the power is off with an appropriate tester.
Step 2: Identify the failed element. Work out which cooking function has stopped. Remember that a hidden bake element cannot be seen from inside the cavity, and check your manual before assuming which element you are dealing with.
Step 3: Remove the mounting screws. On many exposed bake elements, screws at the rear of the cavity hold brackets to the oven wall. The number and position vary by model, so do not assume two or three. Some elements are reached from the back or underneath instead.
Step 4: Ease the element out and photograph the wiring. Draw the element forward gently, just enough to see the terminals. Take a clear photo of how the wires are connected. Do not let the wires slip back behind the oven’s rear insulation. Look at the terminals for discoloration, corrosion, or melting. If they are damaged, replacing the element alone may not solve the problem.
Step 5: Disconnect and remove the old element. Release the connectors, pull the element free, and examine it for cracks, blisters, or burn marks. If it will not come away easily, stop and check the service manual instead of forcing it.
Step 6: Install the new element. Connect the terminals as they were originally, following the manufacturer’s wiring diagram. Align the brackets, secure the screws, and check that no wire is pinched, twisted, or resting on a hot surface. Never improvise connectors or substitute a different wattage.
Step 7: Reassemble and test. Confirm all panels and covers are back in place and no tools remain inside, then restore power. Run the affected mode and watch for normal warming, no error codes, and no sparks, odd noises, or breaker trips. A faint odor on first use can come from manufacturing residue on a new part. Persistent burning smells, smoke, or sparks mean you should switch the oven off and have it inspected.
Installation is not the finish line. A repair is only complete once the oven has been reassembled correctly and tested safely.
Frigidaire, GE, and Whirlpool: What to Check Before You Order
Each manufacturer builds many different oven designs, so the useful question is less “what is the Frigidaire procedure” and more “what does my specific model need.” Official model-specific documentation is the reliable source for the exact steps.
Frigidaire Oven Element Replacement
Locate the full model and serial number first, since manuals sometimes list an incomplete model number. Identify whether you need a bake or broil element, and check compatibility against the Frigidaire parts listing for that model. Mounting and wiring arrangements differ between designs, so confirm them before you begin a Frigidaire oven element replacement.
GE Oven Element Replacement
GE ranges include exposed and hidden bake elements, and some models add a convection element. Identify which type your oven has, verify the electrical rating of the part, and follow the service documentation for your model. A GE oven element replacement on a hidden-element design can involve far more disassembly than on an exposed one.
Whirlpool Oven Element Replacement
Find the model number (Whirlpool points to the oven frame on ranges), then match the part number, dimensions, and connector style. Whirlpool’s model-specific instructions are the right guide for a Whirlpool oven element replacement, particularly when the element sits behind a panel.
Oven Element Replacement Cost
Prices vary by region, oven type, and whether you hire someone, so treat the figures below as typical ranges rather than quotes. Angi’s 2026 data puts professional oven repair at $100 to $600, with a typical electric oven repair at $100 to $250. For a heating element specifically, it gives $150 to $400 for parts and labor, with a representative figure of about $275. It lists oven repair labor at $50 to $200 an hour, and estimates that a DIY repair saves $50 to $200 in labor.
The element itself is often the cheaper part of the bill. Parts commonly run from tens of dollars to somewhat over $100 depending on the model, so check current prices for your exact part number rather than relying on a general estimate.
| Cost factor | Why it matters |
|---|---|
| The element | Depends on brand, model, and genuine vs. aftermarket |
| Labor and service fee | Technicians may charge for diagnosis, access, and testing |
| Oven design | Hidden or rear-mounted elements take longer than exposed ones |
| Extra repairs | Burned terminals or damaged wiring add to the bill |
DIY is not guaranteed to be cheaper. A wrong diagnosis or an incompatible part can cost more than the technician would have charged. A repair that runs past roughly half the price of a comparable new oven is generally worth a second look, and Angi puts new ovens at about $800 to $2,500 plus installation. If you do end up shopping, our guide to induction vs electric cooktops covers one of the bigger decisions in kitchen appliance upgrades.
DIY or Hire a Professional?
A DIY replacement is reasonable when the element is exposed and accessible, you have the exact part, the instructions for your model are clear, the wiring shows no damage, and you understand how to isolate a circuit safely.
Call a technician if any of these apply:
- The oven is hardwired and electrical work is unfamiliar to you.
- Terminals or wires show heat damage.
- The breaker trips repeatedly.
- The element is hidden or needs extensive disassembly.
- The oven is still under warranty.
- It is a dual-fuel model with both gas and electrical systems.
- You cannot confidently say which component has failed.
Angi’s own guidance leans cautious here, describing oven repair as one of the more complicated appliance jobs and recommending professionals for anything beyond simple parts. That is a conservative view, but a sensible one when 240-volt wiring is involved.
Helping a New Element Last
Elements wear out eventually no matter how carefully they are treated, but some habits prevent avoidable damage. Clean the oven according to the manufacturer’s instructions. Avoid knocking exposed elements with pans or racks, and a baking sheet tray that fits your rack comfortably helps. Do not pour liquid onto a hot element, and skip foil on the oven floor unless your manual allows it. Keep vents clear, and look into any burning smell, sparking, or breaker trip promptly rather than waiting.
The same principle of keeping heating parts clean applies to small appliances, as covered in our guide to cleaning an air fryer heating element.
Frequently Asked Questions
How can I tell whether the element or something else is at fault?
Start with the pattern. If bake fails but broil works, the bake circuit is the natural suspect. If the oven heats but will not hold temperature, the sensor or control is more likely. A technician or a qualified multimeter test can settle the question.
Is it safe to use an oven with a broken element?
Not if there are sparks, electrical odors, visible damage, or breaker trips. Switch it off and have it inspected first.
How long does a replacement take?
It depends on the oven. An accessible element can be quick, while hidden elements take longer. No universal time applies.
Why is my oven still not heating after I replaced the element?
Possible causes include incorrect wiring, an incompatible part, a faulty sensor or thermostat, a thermal fuse, a failed control board, or damaged connections.
Why does a new element smell?
Residue from manufacturing can burn off during the first use, so follow the manufacturer’s first-use instructions. A persistent smell, smoke, or sparks means shut it off and get it checked.
The Takeaway
Successful oven element replacement depends less on the screws than on what comes before and after them: a confirmed diagnosis, a part that matches your model, power safely cut at the breaker, and a careful test at the end. Most of the cost savings from DIY come from skipping labor, and that saving disappears quickly if the diagnosis is wrong. If you are unsure at any point, a technician’s visit is a reasonable price for certainty. For more appliance repair and buying guidance, browse our kitchen appliances section.
References
- Angi, “How Much Does Oven Repair Cost? [2026 Data]” (https://www.angi.com/articles/how-much-does-oven-repair-cost.htm)
- Electrical Safety Foundation International, “Do-It-Yourself (DIY) Electrical Safety” (https://www.esfi.org/do-it-yourself-diy-electrical-safety/)
- Whirlpool Product Help, “Where is my Model and Serial Number Located?” (https://producthelp.whirlpool.com/FAQ/Where_is_my_Model_and_Serial_Number_Located%3F)

🌐 FOUNDER & DIGITAL PUBLISHER
Muhammad Ali
Founder | SEO Strategist & E-E-A-T Digital Publishing Specialist

📈 SEO Strategy
🛠️ Appliance Optimization
🛡️ E-E-A-T Standards
Muhammad Ali is a digital publisher, SEO strategist, and founder of Home Appliances Info. He specializes in home appliance optimization, structured schema networks, and advanced E-E-A-T digital publishing standards to ensure accurate, trustworthy content across the platform.